Tuesday, December 1, 2009

Tis' the Season

I absolutely adore this time of year. I think it has something to do with the Christmas carols, decorations, and the sense of family that seems so strong during these times. Another one of my favorite things about the Christmas season are cookies, lots and lots of cookies, and I think my husband couldn't agree more.

I am going to branch out of just doing cookies and hopefully incorporate quick breads to go along with all of the other baked goodness in our home. I am excited for our 2nd annual cookie exchange as well as baking for gifts and those just because moments.

I have compiled a list of items I hope to make during the next 24 days. Thank goodness my MIL Sue stocked piled our freezer with butter, I do believe I will use every last pound over the course of these next few weeks. The goal is to make two to three different kinds each week, I will be more than happy if I can knock out one. I have listed each cookie that will be made for each week but in true Katie fashion, please do not hold this to me as things change with my moods daily...LOL. For all I know I may not feel like snickerdoodles on snickerdoodle day and instead throw together some peanut butter cookies...who knows, it's all a part of the fun!

Week One:

Festive Shortbread- Can you go wrong with shortbread?

Lemon Coolers- My sister Nikki loves lemon and this seemed really refreshing.

Double Chocolate Cookies by Eagle Brand- Double chocolate...enough said!

Week Two:

Dutch Apple Loaf- I have a bushel of apples coming my way, need recipes to use them up in.

Snickerdoodles- Simple and easy to make, what child doesn't love cinnamon and sugar combined?

Peppermint Cookies- Cookies with a nice little crunch.

Week Three:

Chocolate Crinkle Cookies- The family favorite which I have never made all by myself.

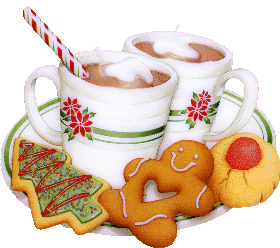
Traditional Christmas Sugar Cookie- Because everyone needs to decorate cookies at least once during the season!!

Strawberry Bread- I love strawberries and who can resist a layer of cream cheese goodness in between layers?

I am still deciding if week one will start this week or if I will push it off until next Monday. If that is the case I will do my best to knock one recipe out this week that may or may not be listed above. That will also mean some additions for the week of Christmas. Here are a few more that I would like to include but we will see how far I get. I wanted to share them just in case they float your boat further than the items listed above!

Muddy Buddies- Something sweet to munch on without having to babysit the oven!

Holiday Tree Brownies- For those of us that don't necessarily have to bake from scratch to enjoy a good treat. I will save these for the cookie exchange since we all sit around and decorate then!

Holiday Thumbprints- These are most definitely going into rotation, it's a just matter of when.

I wonder if I have bitten off more than I can chew? My kitchen aid is definitaly going to get a workout this month and can I let you in on a little secret? I can't wait!!!!!

What are some of your favorite holiday baked goods that you find yourself making year after year? Feel free to share the links or the actual recipe so that everyone else can enjoy!

Here are some of the sites I stumbled upon the recipes at! For those of you with young children or who are young at heart like myself...whoever said Santa doesn't exist needs to be whipped, here is a great site to visit.

northpole.com
bettycrocker.com
allrecipes.com


glitter-graphics.com

Sunday, November 29, 2009

Stuffed Mushrooms

This post is going to be short and sweet and unfortunately without a picture. I made these stuffed mushrooms for Thanksgiving and didn't get an opportunity to take a picture before sending all of the leftovers home with Uncle Dan. I am not a mushroom fan so I can't tell you if they were good or not. Uncle Dan thought they were awesome and Aunt Robin who normally wouldn't touch them with a ten foot pole actually ate one and said they were pretty good. They made a great appetizer for the holiday and would be great at any party or event you might be attending or even throwing!

Katie's Stuffed Mushrooms~

Ingredients:
2 doz. mushrooms
1 lb. ground sausage, browned and drained
1 C. Italian bread crumbs
1/2 onion, diced
1 8oz. block cream cheese, softened
1/2 C. Parmesan cheese
2 tsp. salt
1 tsp. black pepper
1 C. shredded mozzarella cheese

Directions:
1.) Preheat oven to 350 degrees Fahrenheit.
2.) In a skillet over medium heat brown sausage and diced onion.
3.) To sausage mixture add bread crumbs, salt, and pepper.
4.) Remove from heat and add cream cheese and Parmesan cheese until evenly mixed.
5.) Scoop about 1 tbsp. of sausage mixture to each mushroom that has been cleaned with a damp towel. Sprinkle top of each mushroom with mozzarella cheese. Repeat until all mushrooms are filled.
6.) Bake for 30-40 minutes are until cheese has browned and mushrooms is soft.


New Bedding

Note to self, do not share with anyone your bedding selection that has been chosen for your baby to be's nursery until bedding has actually been purchased or has been received.

Remember the bedding I showed you a week or so ago? Yeah, well, it was a big flop, damn e-bayers, needless to say it's going bye-bye so something else had to be picked. Once again my MIL stepped up to the plate and agreed to split the cost of bedding with us so that we could have something nice. She ordered it today and it should be here within the next two to four weeks. Does anyone else out there love their MIL's? I have always been curious because it seems like most could live without them.

Anyway, here is the new bedding. It's not in hand yet so don't be surprised if some major event means we have to pick something else but I am confident with this one so please keep your fingers crossed!

Daniel wouldn't allow all girly colors in the nursery so I couldn't paint all of the walls pink. We also both wanted a farm theme. I think this bedding was a nice compromise don't you?

Friday, November 27, 2009

Vodka Sauce Re-Run

We all know my love of pasta is never ending so after letting almost a year go by since having made this particular dish I figured it was about time to whip up another batch. Daniel didn't get to enjoy this feast the first time I made it so it was his first time.

Did he enjoy it you ask?

Why yes he did!

Would you like to know how I knew without having to ask him?

He went back for seconds!

I am reposting this again for those of you who weren't around the first time but as you can see I threw in a new picture for those of you who will be viewing it for a second time. It's all about mixing it up here at Katie's Korner! :)

Here is the original post.

Here is the recipe along with a new photo of the dish.
Katie's Vodka Sauce~
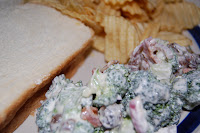
1 Chicken Breast, diced and browned ( I used two the second time around)
1/2 Lg. Onion, chopped finely
1 28 oz. can of crushed tomatoes (Accidentally used tomato sauce instead of the crushed this time...tasted just fine)
3 Cloves of Garlic, chopped finely
1 C. Heavy Cream
1/2 C. Vodka
1 tsp. Salt
1 tsp. Pepper
1 tsp. Dried Basil
1 tsp. Dried Oregano
Butter/Margarine
Extra Virgin Olive Oil
Pasta of your choice

Directions:
1.) Begin by cutting your chicken breast up into small pieces, saute in pan with tablespoon of butter/margarine and tablespoon of extra virgin olive oil. Cook until brown. Set aside in small bowl.

2.) Add two tablespoons of butter/margarine along with a tablespoon of extra virgin olive oil to same pan and add onion and garlic. Add a teaspoon of black pepper and salt to the onion/garlic mix.

3.) Cook onion and garlic mix until translucent. Add vodka and simmer for 3 to 5 minutes.

4.) Add crushed tomatoes.

5.) Add heavy cream and gently stir together.

6.) Add basil and oregano.

7.) Add chicken back into sauce mixture and stir.

8.) Allow sauce to simmer on low heat for a half hour.

9.) Add sauce to your favorite pasta. For this meal I used Tubetti by De Cecco and topped it off with Parmesan cheese.

Anyone else get a kick out of how many steps I turned the directions into last December? Did I really need nine different steps on how to create the sauce? I think steps 5-8 could easily be combined into one line...LOL.


Tuesday, November 24, 2009

Mongolian Beef and Veggie Egg Rolls

Friday nights at our house are usually our go out to eat nights. The one day off I allow myself from the kitchen. Since Thanksgiving is Thursday and because peanut oil for the deep fryer is $30 a jug, we decided to stay at home to save a few bucks this past Friday.

Daniel loves Chinese food!! I am one of those people who can take it or leave it and most times I choose to leave it. Since it's all about making my hubby happy though I am trying to incorporate more Chinese friendly dishes into our rotation at home. I stumbled upon this recipe and tweaked it a time or two and I must say it turned out really well. It went really well with the egg rolls we made to go along with it. They weren't the prettiest things...I have to work on my rolling skills...but they were actually pretty delicious...more so than what I can say about the egg rolls that get delivered from the professionals.

Katie's Mongolian Beef~
Ingredients:

1/2 lb. beef (Not sure what cut we used, but it was flat and very, very thin which I then cut into strips)

1/4 C. soy sauce

1 tbsp. hoison sauce

2 tsp. sugar

1 tbsp. garlic, finely diced

1 tbsp. red pepper flakes

1 tbsp. teriyaki sauce

Extra virgin olive oil

2 green onions, diced on the diagonal

1 C. cooked white rice*

Directions:

1.) In a medium mixing bowl whisk together your soy sauce, hoison sauce, sugar, garlic, red pepper flakes, teriyaki sauce, and a few drizzles of extra virgin olive oil. Add your strips of beef and marinate for two to four hours.

2.) In a large skillet heat over medium high heat. Add strips of beef along with any extra sauce left in the bowl. Cook until brown on both sides and then throw in green onions, toss around and then lower heat to low for five minutes ensuring that beef is cooked through. Serve over white rice.

*Whenever I cook white rice for dishes such as this one, I always add a teaspoon of red paper flakes to the water to boil. This addition gives the rice a nice little kick.


Veggie Egg Rolls~

Ingredients:
1 C. cabbage, thinly sliced
1/2 shredded carrots
2 green onions, thinly sliced
teriyaki sauce
6 egg roll wrappers

Directions:
1.) Begin warming your oil. (We use our fry daddy, but you could easily do yours in a pan on the stove, use enough oil to cover half of the egg roll.)

2.) Take one egg roll wrapper and add cabbage, carrots, and green onion. Enough to fill your wrapper but leaving you with enough to fill each additional wrapper. Drizzle your filling with a little bit of teriyaki sauce. Proceed to roll*. You may need to dab a little bit of water where the wrapper ends to form a seal. Repeat this step for each egg roll.

3.) Gently place each egg roll in your oil. Lightly brown each side...you may have to flip the egg roll to brown the opposite side. If your oil is warm enough this should take two to three minutes or so. Place on a paper towel to drain.

4.) Serve with either duck sauce or soy sauce!

*Most packages containing the wrappers give you a set of instructions on how to fill and roll them. If not, place one corner near you and horizontally add your filling, roll upward once and then tuck in each side, continue to roll until you get a perfect shaped egg roll.

Results

Peanut...good news, we passed our glucose test with flying colors. I am a little concerned though, when I asked the nurse whether she thought the 45 minute delay that took place Friday could affect my results her comment was..."you're the one".

Why do I get the feeling my ordeal was the topic of conversation for a day or so afterwards...LOL. I did ask if I should redo it just to make sure we were all right but she said that I was fine. YAY, now we just have to get through the big shot in the rear on the 7th.

Broccoli Salad

We get this particular salad all of the time from a local grocery store around our neck of the woods. The store itself is pretty expensive and not meant to do your everyday shopping unless you have more money than you know what to do with. Daniel and I like going there for specialty items and stuff like this when we feel like pampering ourselves. You know you're a foodie when going to a high end grocery store is your way of pampering yourself...lol.

Anyway, we both really enjoy it and it's a good way to get broccoli into your system. This time, instead of spending way to much money on it I spent less but got more by making it myself.


Broccoli Salad~
allrecipes.com
  • 10 slices bacon
  • 1 head fresh broccoli, cut into bite size pieces
  • 1/4 cup red onion, chopped
  • 1/2 cup raisins
  • 3 tablespoons white wine vinegar
  • 2 tablespoons white sugar
  • 1 cup mayonnaise
  • 1 cup sunflower seeds (I omitted)
Directions:
  1. Place bacon in a large, deep skillet. Cook over medium high heat until evenly brown. Drain, crumble and set aside.
  2. In a medium bowl, combine the broccoli, onion and raisins. In a small bowl, whisk together the vinegar, sugar and mayonnaise. Pour over broccoli mixture, and toss until well mixed. Refrigerate for at least two hours.
  3. Before serving, toss with crumbled bacon and sunflower seeds.

As you can see from the picture this salad goes great at lunch paired with a sandwich and a handful of potato chips.